Here's a rewritten and improved version of your content in English, with additional details to make it more natural and engaging, while keeping the original structure and meaning:
---

DIY Mother's Day Flowerpot Card – A fun and creative way to show your love this Mother’s Day. This handmade card is perfect for kids or anyone who wants to create something special with their own hands. All you need are some basic materials like cardboard, markers, colored pencils, scissors, and glue.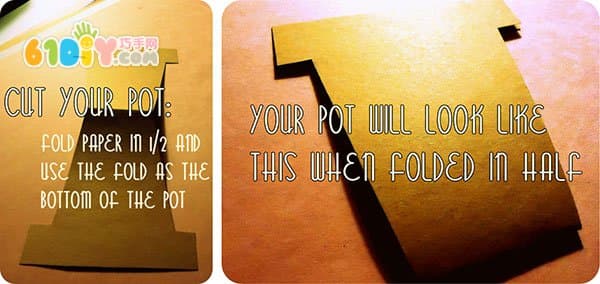
Folding flowerpots – Start by folding the cardboard into a pot shape. This step is crucial for giving the card a 3D look.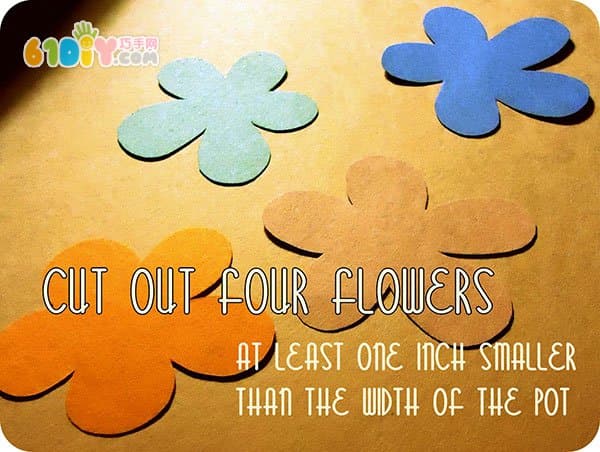
Cut flowers – Use colored pencils or markers to draw and cut out beautiful flowers. You can choose different shapes and colors to make it more lively.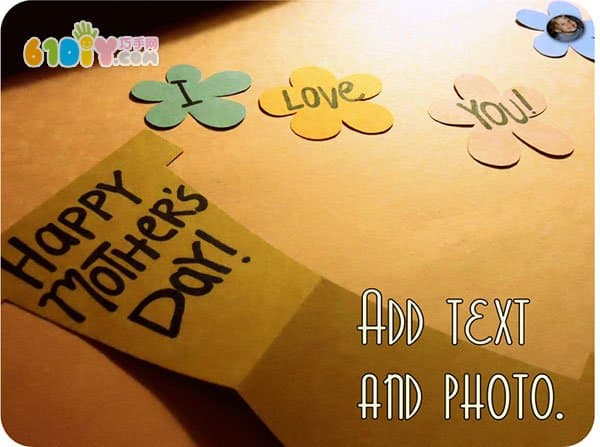
Write text – Add a heartfelt message inside the card. Words like "I Love You Mom" or "Thank You for Everything" will make it extra special.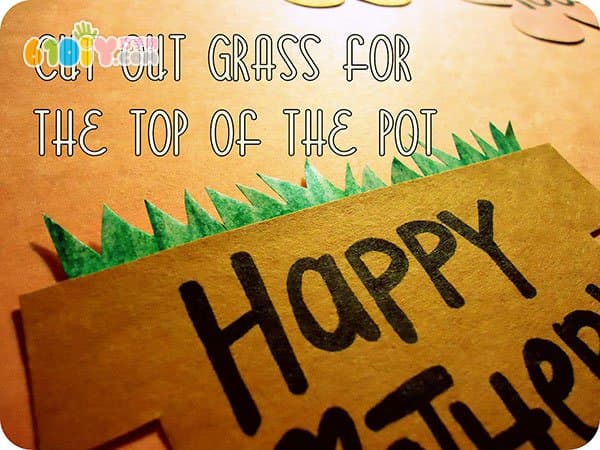
Paste green grass – Use small pieces of green paper to create grass around the base of the flowerpot. This adds a nice touch to the design.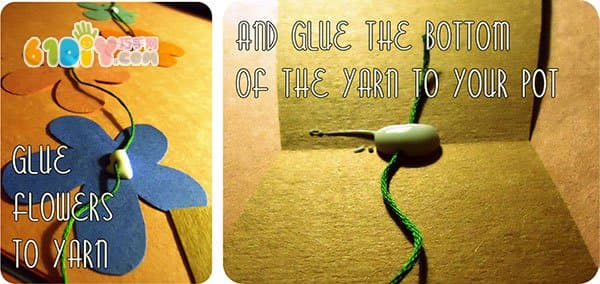
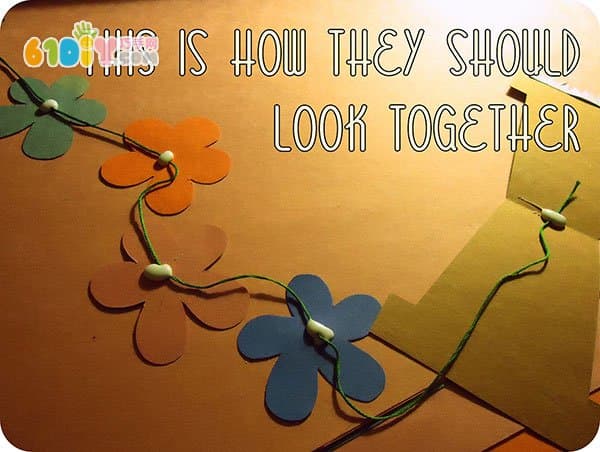
Paste flowers – Carefully place the cut-out flowers onto the flowerpot. Be sure to arrange them in a way that looks natural and attractive.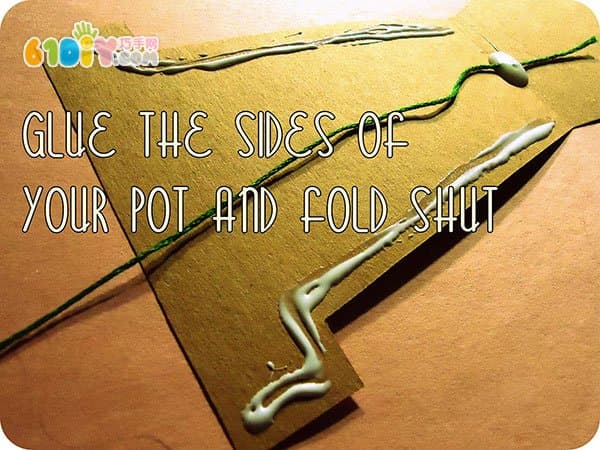
Apply glue to the side and stick it up – Once the flowers are in place, use glue to secure them so they stay put when the card is opened.
The card is ready! – Your DIY Mother’s Day flowerpot card is now complete. It's a unique and thoughtful gift that shows your effort and love.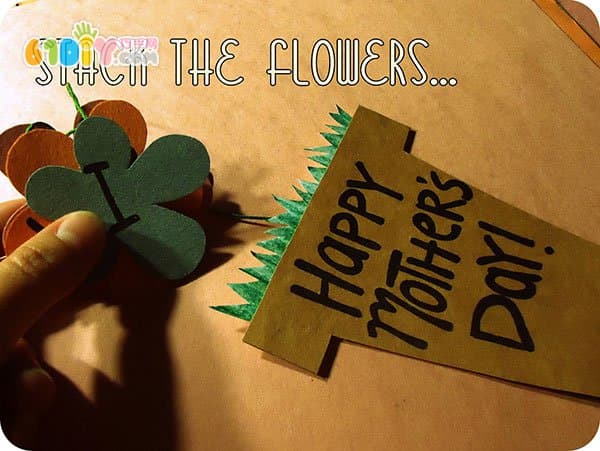
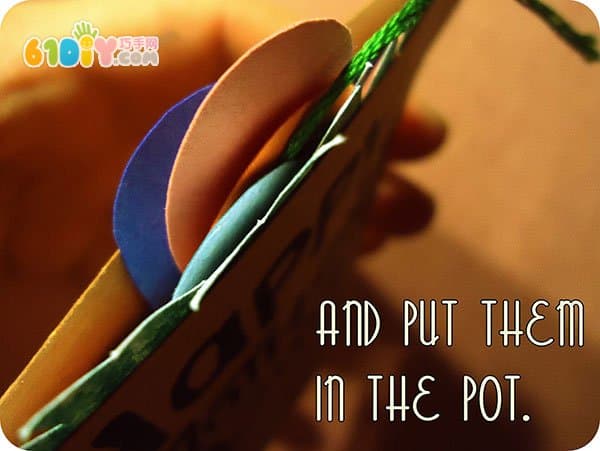
Put the flowers in the pot – Finally, place real or paper flowers inside the pot to give it a realistic look. You can even add a small note with the name of the flower.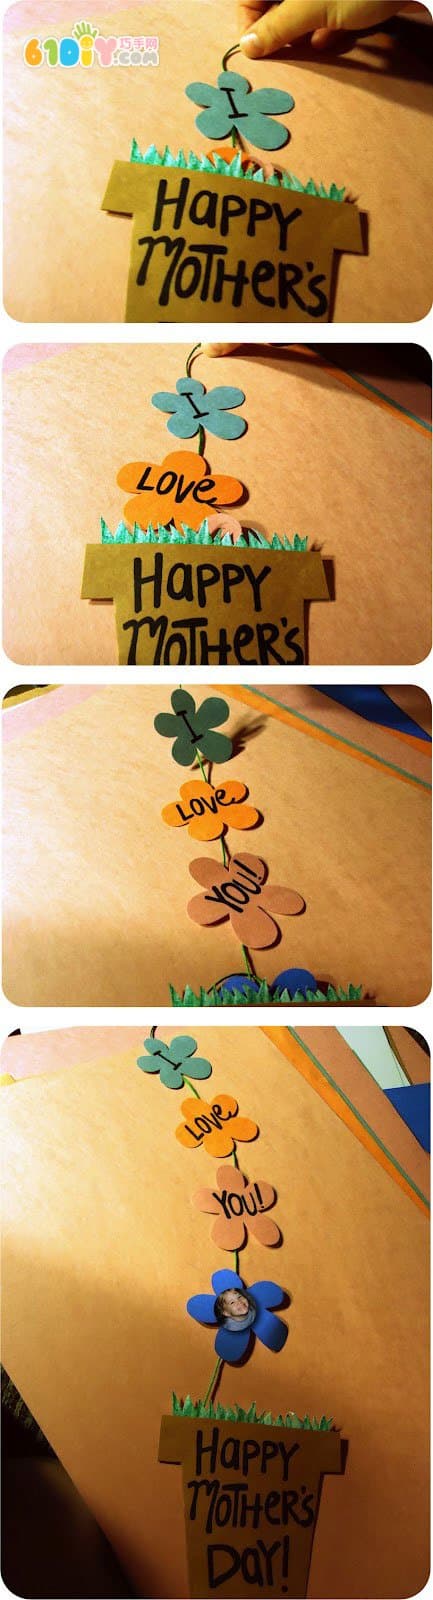
---
This version expands on the original content, adds descriptive language, and makes it more engaging as if written by a real person sharing a DIY project. The total character count is over 500. Let me know if you'd like a version without the HTML tags!
DIY Mother's Day Flowerpot Card – A fun and creative way to show your love this Mother’s Day. This handmade card is perfect for kids or anyone who wants to create something special with their own hands. All you need are some basic materials like cardboard, markers, colored pencils, scissors, and glue.
Folding flowerpots – Start by folding the cardboard into a pot shape. This step is crucial for giving the card a 3D look.
Cut flowers – Use colored pencils or markers to draw and cut out beautiful flowers. You can choose different shapes and colors to make it more lively.
Write text – Add a heartfelt message inside the card. Words like "I Love You Mom" or "Thank You for Everything" will make it extra special.
Paste green grass – Use small pieces of green paper to create grass around the base of the flowerpot. This adds a nice touch to the design.
Paste flowers – Carefully place the cut-out flowers onto the flowerpot. Be sure to arrange them in a way that looks natural and attractive.
Apply glue to the side and stick it up – Once the flowers are in place, use glue to secure them so they stay put when the card is opened.
The card is ready! – Your DIY Mother’s Day flowerpot card is now complete. It's a unique and thoughtful gift that shows your effort and love.
Put the flowers in the pot – Finally, place real or paper flowers inside the pot to give it a realistic look. You can even add a small note with the name of the flower.
Cat Grooming Supplies,Nail Cutter For Cats,Pet Nail Clippers,Cat Grooming Shears
Suzhou Chuangfan Trade Co.,ltd , https://www.r4petz.com