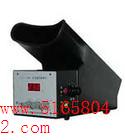
Flash Fusion Frequency Meter / Highlight Scintillator / Model: HA/BD-II-118
When a light source flashes at a lower frequency, it creates a noticeable flicker, known as the flicker effect. As the frequency increases, this flickering sensation gradually disappears, and the light appears steady—this is referred to as the fusion of light. The lowest frequency at which the flicker disappears and the highest frequency before it reappears are collectively known as the flash fusion critical frequency. This measurement is crucial in assessing how well the human eye can detect rapid changes in light, which relates to visual acuity and temporal sensitivity.
The Flash Fusion Frequency Meter, also known as the Highlight Scintillator, is used to measure this critical frequency. It helps evaluate an individual's ability to distinguish between flashing and steady light, offering insights into visual performance and cognitive states. Additionally, it can assess how factors like color, brightness, contrast, and background lighting affect the critical frequency. These measurements are widely used in psychological research, personnel selection, and fatigue monitoring.
Visual acuity is a fundamental aspect of vision and serves as a key indicator of both visual and mental fatigue. People in different states often show significant variations in their flash fusion frequency. A higher frequency generally indicates better brain awareness, while a lower frequency may suggest fatigue. Therefore, measuring flash fusion frequency is a common method for evaluating human fatigue levels, with daily and weekly fluctuations being particularly useful indicators.
This instrument is designed for use in psychological experiments and professional assessments. It uses computer-controlled technology to ensure high precision, stability, and ease of operation. Its compact and integrated design makes it user-friendly and reliable for repeated use.
Main Technical Specifications
1. Flashing frequency range: 4.0–60.0 Hz, adjustable in 0.1 Hz increments using a digital potentiometer. The display shows three digits with an accuracy of less than 0.1 Hz.
2. Bright spot colors: Red, yellow, green, blue, white (five options available). Diameter: φ2 mm.
3. Observation distance: Approximately 500 mm.
4. Background lighting: White, with four intensity levels: full brightness, 1/4, 1/16, and completely dark.
5. Waveform: Square wave.
6. Brightness-to-black ratio: 1:3, 1:1, or 3:1.
7. Bright spot intensity: Seven levels: 1, 1/2, 1/4, 1/8, 1/16, 1/32, 1/64.
8. Dimensions: 300 × 150 × 250 mm.
9. Power supply: AC 220V ± 10%, 50Hz ± 1Hz. Operating humidity: ≤85%.
10. Power consumption: 5W.
Instrument Components
1. The subject’s observation section includes an observation tube, a “Frequency Adjustment†knob for changing the flashing frequency, and a “Color Selection†knob.
2. The main control panel features a three-digit display showing the flashing frequency. Below it, there are three knobs for adjusting the bright spot intensity, brightness-to-black ratio, and background light intensity.
Usage Instructions
1. Turn on the power switch located on the left front of the device. The initial flashing frequency is set to 10.0 Hz.
2. Ensure the subject’s eyes are close to the observation tube and focused on the center of the bright spot.
3. First, set the background light intensity, bright spot brightness, brightness-to-black ratio, and color to your desired settings. Then proceed to determine the critical frequency.
4. Adjust the frequency by turning the “Frequency Adjustment†knob on the right side of the device. The frequency will increase or decrease accordingly, and the bright spot will flash in real time during the adjustment.
5. When the subject no longer perceives the flicker, stop the frequency immediately and record the displayed value. If the flicker is initially visible, adjust quickly until it disappears, then note the frequency. Repeat the test around the fusion point to get an average result.
6. To test different colors, turn the “Color Select†knob to choose the desired color.
7. To study the impact of brightness on the critical frequency, keep other conditions constant and test under various intensities. This method applies to all other variables affecting the critical frequency.
Precautions
1. If the display does not work after turning on the power, check the power plug, cable, fuse, and power switch. Also verify the +5V regulated power supply.
2. Place the instrument in a dry and well-ventilated area.
3. If not in use for long periods, power the device for more than 4 hours every three months. In high humidity environments, power it for over 4 hours monthly to prevent damage.
Apartment Furniture,Standard Hotel Furniture,Hotel Suite Furniture,Hotel Furniture Table
PinSheng hotel furniture , https://www.pinshotelfurniture.com